Monday, October 20, 2008

San Francisco to Olympia is a Long Commute

This is a picture of a tree in the eveing light.  It is a couple blocks from the boat shop, and I walk by it every day that I go there.  For most of the year it's a fairly non-descript young maple tree, but for a couple weeks it really put on a show.


JD was here and now he has gone and I'm alone in the boat shop again.  Three days is not long enough.  However, we made a great leap in our progression toward actual boatiness.  Two garboards are glued in place, and they'll soon be ready for the next planks to be attached.  

[Warning! The next passage may contain indeciferable technical jargon.  Read at your own risk.]

I still have to cut the overhang off of the port garboard in the stern, and then check the curve of the sheer side (top) of both garboards.  Then I'll bevel the sheer edge of the garboards where the next planks will lie and we'll be ready to rock again.  I anticipate the beveling taking some time, and I need to sharpen up the planes again, but all in all things are moving along.

I won't be in the shop for a few more days as I'm working up at my mom's house, putting in some new windows, but maybe I'll get in there this weekend if Abel doesn't have any work for me.  


Tuesday, October 14, 2008

Excellent Work


Today we installed the port side garboard strake.  When I say we, I mean JD and Drew were both in attendence.  No video conferencing, no Skype chat, but real, honest to goodness person to person collaboration.  It was excellent. 

Yesterday we glued on the starboard strake.  The aft end had a moderate gap around the transom and we just filled that full of epoxy.  I think it will be great. 

The port side was a little more problematic since we broke off both of our little drill bits while drilling pilot holes.  Without a car we started to get nervous since we had already spread epoxy basically everywhere.. but we called Steph who saved our freaking asses and went to the hardware store and picked up bits.  See figure 2.1


Friday, October 3, 2008

Thinking About Oars

JD will be here soon to help with installing the garboards.  I haven't been in the boat shop much since they've been finished, but I've been doing some research into oars.  

I've found a few recomendations for the leverage ratio an oar should have, but the concensus seems to be that you should find an oar that is comfortable and moves your boat along well.  So much for formulas.

Maybe instead of jumping into building three sets, I'll build one set at a time so we can test them.

Thursday, September 25, 2008

Planning


Yesterday I planned.  I thought about the planking process, what we'll need, and the steps that happen after that.  I got to thinking about the rudder, which I lofted (drew full size) on the table and changed a little from the pattern.  I thought about the centerboard and centerboard case, and the decks that will be substantially different than those the designer calls for in the plans.  

I'm waiting for JD Ross to come up from San Francisco so we can attatch the garboards together.  It's a two person job.  In the meantime I might be able to get a start on the oars.  We're going to need six of them, three pair,  and that's a lot of work.

Monday, September 22, 2008

The New Table, The New Garboard, The News on Scarphing

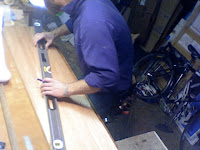
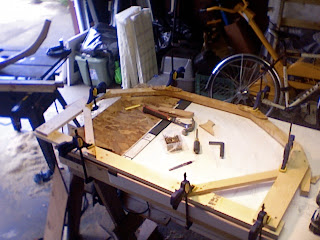
I built this huge table for laying out the planking and gluing it.  It's made of a 4' x 10' sheet of 1" MDO.  It's plywood that has a leveled surface that's covered with paper.  It's easy to draw on, and really smooth and flat.  I was hoping it would be a little stiffer, but it's good enough for a gluing surface.  The half sheets are light enough to move around easily by myself, so I unscrew them from the horses and double them to make a stiff enough surface for scarphing.


I glued the port garboard scarphs today.  I'm definitely getting better at it.  I think that these ones are going to turn out pretty well.  Better than the last seven anyway.  Maybe by the time we get to the sheer strake I'll be expert at this plywood scarphing thing.

The most important things I've learned are things that I "knew" already.  The subsurface (the bench or whatever the scarphed objects are sitting on) really has to be perfectly flat, at least the part directly under the scarphing zone and a bit past.  Otherwise the plane will bridge over the low spots or take too much off the high spots.  The clamping strip that's nailed or screwed through the scarph should really be exactly the width of the scarph.  It's also nice to wrap the strip in plastic and staple it on so there's no plastic flapping around, allowing a clear view of the joint once it's clamped.      

Sunday, September 21, 2008

A Visit From Andy

Our old friend Tetris Wassertron visited the boat shop today.  Helped clean up a little, and kept me company while I slowly moved ahead with the port garboard.


Thursday, September 18, 2008

Port.

Last week I patterned and constructed the starboard garboard.  So far this week I've fixed my mistake at the stern, and begun preparations for the port garboard.

I'm not sure exactly how it happened, but the plank that I made for the starboard side ended up a little short from top to bottom in the stern.  Yesterday evening I added a piece to that section, which I faired in today.  So the starboard side fits now.  When the boat is all planked and we turn her over, I think we'll probably want to add a stringer along that seam from the transom to frame number six to shore up the small joint and ensure structural integrity.

As I suspected, the plank that now fits on the starboard side doesn't exactly fit on the port side, meaning the boat isn't exactly symetrical.  Hopefully this minor asymetry won't affect the tracking and handling of the vessel too much when she's in the water.  I think the effects will probably be neglegable as the disparity is within an eighth from one side to the other.

Saturday, September 13, 2008

Garboard Ho!

So, does that look like a boat or what?  It looks like a boat.  Maybe we'll just have a garboard canoe.  Keep it low profile.

Or maybe we'll make a whole boat and row to Alaska.  I'll have to talk to JD about it.  Canoe?


I cut out the garboard and test fit it today.  It mostly fit.  The part that doesn't, well, I'm going to have to fix it.  

Wednesday, September 10, 2008

More Scarphing

I worked a little more slowly today.  I needed to be really careful with the garboard scarphs because I have very little leeway for error.  The angles that I measured, and the distances that I calcuated with the pattern left me only a quarter inch or so at each end. 

But now the garboard is all scarphed.  The next time I'm in the boat shop I'll transfer the spiling marks from the pattern onto the big scarphed board and cut out the first plank.  

Tuesday, September 9, 2008

Patterns and Spiling

I've finally finished all the fairing.  The new battens (thank you John Gardner and Howard Chapelle for the dimensions) made what was once almost impossible into a relatively easy task.  I still spent several days working my way along each frame, making the bevel just right to accept the planking.  


Yesterday, I ended the day making the pattern for the garboard plank.  This is really exciting because it means we've made it to the next major part of the project (and the part that makes the boat a boat).  We're now separating the inside of the boat from the outside, making it a floatable object.  


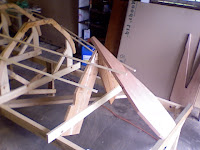
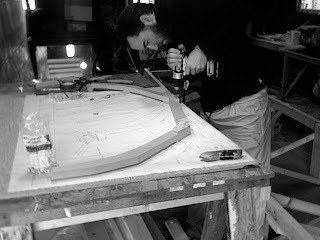
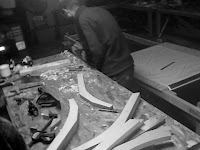
Today I finished making the garboard pattern, and spiled the shape of the plank-to-be onto it.  Spiling is the process of transfering a three dimensional shape onto a flat piece of something (probably wood) that's held against the object.  In this case the object is the hull of the boat, the transfer tool is a compass, and the flat spiling stock is 1/8 inch plywood bent around the frames of the boat.  (The pictures will make it a little clearer.)  


After finishing the pattern and spiling, my problem this morning went something like this:  I have one eight by four foot piece of plywood to make the garboard plank with.  The plank is about 17 feet long by twenty or so inches wide with a big curve.  How did I get 17 feet out of 16 feet?  Very carefully.  Look at the pictures to discover my fancy style.     


Thursday, August 21, 2008

Lining Battens

Here you can see my newish toolbox (that I built!) and part of the process of scarphing a couple lining battens. The toolbox illustrates that I've been traveling with my tools, to my house and back mainly. The lining battens illustrate my lack of trust in our offsets.


Now She's Scarphed, Cut the Bottom Please


Scarphing the Bottom

Hey! Let's do recaps shall we? Everything I've posted so far today is already represented on here somewhere. And this isn't anything new. But we've got all these great pictures, so let's use them.

We scarphed the bottom. You enjoyed the time-lapse already. Now enjoy some stills (I command you).


Action Shots, or How to Look Like You Know What Your're Doing in a Boat Shop


That Damn Sheer Clamp (Inwale)

Now that I look at this picture again, I think that those crutches (in the background by the window) in the boat shop were probably a bad idea. What better way to jinx a project than hang crutches over it.
The intended object of discussion in the photo however is the big chunk of wood glued into the sheer clamp notch. (That's not supposed to be there... shhh.) This is our way of making a fair curve happen on the sheer line. It might be working, but when we did it we had yet to discover either of our two big layout mistakes. It looks pretty good though, no?

Stem Layup

As you can see, we alternated the direction of the stem laminations (hence the blue and wood-toned stripes) to counteract any thickness inconsistencies. But this is obviously old news.


Monday, June 2, 2008

JD Leaves, Drew Sweeps Up and Makes Coffee


Today was my first day in the boat shop since JD flew south. During the intervening period I took a week off from boat related things, saw my sisters, went camping, and visited JD's ancestral homeland as well as the eventual site of his burial at Mold, WA.

I tried to emulate the pattern of work that JD and I developed while he was here. I stayed a little long at the coffee shop and worked the crossword. I made more coffee at the boat shop. I went to the hardware store and bought garbage bags, a dustpan and a small broom for sweeping up an enormous pile of wood shavings, the "fire hazard" Tim joked about last week.

While I worked I listened to Beowulf, translated and read by Seamus Heany. I couldn't help but think of the future, looking a little like a Spear-Dane myself, rowing into some distant fjord. I didn't have any sword to brandish so I sharpened a hand plane and set to work on the shims that JD and I glued to frames 3 and 5 before he left.

I think the fairing of the frames is about as good as it's going to get, given the flaws we've made permanent so far. Tomorrow I'll work on the stem and transom, and then... planking begins!

Wednesday, May 7, 2008

Gluing the bottom on

Today we finished up the limber holes, and decided we were ready to glue the bottom on.

Here is a video of us doing just that.

Cutting out the bottom

We're hoping this video might be a little more entertaining than the last few. Enjoy.


Monday, May 5, 2008

Sunday, May 4, 2008

Okay the sheer clamp is on for good

No taking it back now. This epoxy is serious.


Wednesday, April 30, 2008

The great sheer clamp debacle

Today is the sixth day we've been working on the sheer clamp. It has been haunting our dreams.

We've made a lot of small adjustments, including some changes to the structural layout of the frames. We now believe (though we may be delusional) that things are more symmetrical, plumb, level, true, fair, and all other words that mean good.

This picture below shows us in triumph (for the moment) next to the boat with sheer clamp temporarily attached. If you can pull your eyes away from the riveting sight of my ass, the 2 sheer clamps can be seen held to the stem with the two c-clamps and pink string.


Wednesday, April 23, 2008

Background information

To the left is a picture of the completed boat design that we are building. I hope this sheds some light on the subject for those who've asked. The design is called John Dory, and was made by a Scottish man named Iain Oughtred.

Saturday, April 19, 2008

Mounting the stem

We also mounted the transom, but you can't see that in this video..

Tuesday, April 15, 2008

Marking and cutting out the transom

Here are a couple of shots of us working on the transom. Its a piece of dark red meranti, which is also called "Philippine mahogany," though I guess its not technically mahogany.


In the this shot you can see us working on the bevel that the planks will line up against. Hopefully...


This is a look at how the transom will eventually be mounted to the rest of the boat. Are you visualizing?? Can you see it??

Gluing Stem Laminations

ugh, these are such boring blog titles.

at least the pictures are sexy and fun. like below:

Monday, April 14, 2008

Ripping laminations for the stem

This video shows us goofing around a lot, trying to get ready to rip our big white oak board into 2" x 1/8" strips. It took us awhile to set up, because the board wasn't two inches high. We solved that problem by making the cuts at an angle thus increasing their measurement to 2"+.

However, when we started ripping with the table saw, we realized that a lateral bow in oak meant that we couldn't line the board up accurately on the table saw. Starting at 0:08 or so, we begin planing the board offscreen.

After we rip the board into something like 20 strips (lams), we have to set up the jig that we will be bending them on. This requires cleaning off the table, marking out the structure of the curve from the plans, and then using a batten to draw a fair curve. As you can see, this takes me a long, long time. Drew has to help.

Then we aligned blocks along the curve, using a unnecessarily labor intensive drilling and screwing procedure that looks like some sort of complicated dance. This is my favorite part in all the movies. Its also a little embarrassing.

After setting up the blocks, we quickly and with almost no fanfare clamp the lams to the jig. Thats what all this work was leading up to.

Saturday, April 12, 2008

Tuesday, April 8, 2008

Time Lapse: Attaching the frames


Here we are setting up the frames on the jig. You can see that the boat will be build upside down. The video is shot from the stern, so what will be the bow is at the far end of the garage.

Monday, April 7, 2008

Mounting the Frames


We've now assembled all five of the permanent frames and the two temporary stations molds. The next step is to mount them on the building jig.

In order to mount them we have to attach them to frame posts, and then to spalls which are attached to the jig.

Today we added posts and a spall to one frame, and marked out where the rest of the spalls will go on the frame jig.

Assembling the Frames


The frames are first screwed together with gussets. We used silicon bronze screws. After assembling the frames, we took them apart, coated the joints with epoxy and reassembled them.

Sunday, March 30, 2008

Working on the frames

The frames and molds function like the ribs of the boat. The five frames are permanent, and will be in the boat when its completed. The two molds, one forward and one aft, are temporary, and are included to help with the planking process.

Each frame consists of three pieces. There is a floor piece that runs parallel to the bottom of the boat, and two side pieces that run up the sides of the boat. The pieces, are attached together with marine grade fir plywood gussets and epoxy.

At this point we've just completed cutting out and planing down the frames and cutting out the gussets. Our epoxy order was delayed, but it should be here on Tuesday and we can start gluing then.

Setting up the shop


Since Drew has been back we've been working on setting up the shop a little. We moved the jig around a little, and build a bench for us to work on. We also set up more lights. Here is a shot of drew setting up a light.

You can also see a little plastic room we constructed in the garage so our landlords can continue to keep things in the garage safe from sawdust and whatnot.

The jig in the foreground has been reinforced and we decided in the end to glue it to the floor. Its super sturdy now. Since this picture we've added the centerline that the boat will be built around.

Saturday, March 8, 2008

The Building Frame

The building frame is not part of the boat, its like a bench that the boat rests on as we build it. The molds, which are like the ribs of the boat, are attached to this frame. It is important that the frame be level and straight. Especially if you are building it on a cracked concrete floor...

So, the other day I brought over the bearers (the long pieces that run lengthwise). Drew had previously screwed them together and planed and leveled the tops. I cut them to their appropriate length: 18' 1 1/2". It took me a long time to feel comfortable that they were truly parallel and at the right distance from one another. When I felt good about it, I added the two crossbars that you see in this picture.

Today, I added the legs of the frame. Again, I took a long time to make sure that everything was level every which way. In the end, I think I did a good job. Here is the frame with legs.

I know these aren't super exciting pictures, but we have to have patience, okay? Bear with me here. Maybe tomorrow I'll pose nude in the middle of the shot or something.

Friday, March 7, 2008

JD arrives, shit gets done

Okay, I got up to oly a few days ago. Lets see, its been six I think. The first few days were a rush as Drew and I tried to go over everything we needed to talk about before he left for Paris on the 4th.

We went over the plans, looked through the tools he's been collected, talked about what should be done while he's gone, and went to look at the garage he's found where we can build the dory.

The people whose garage it is are really great, and it seems like things are going to work out there. The only problem was that there garage was full of dirt from a medium sized gardening project they'd been working on. Of course, they were willing to clean it up for us, but given schedules, work, homework, etc, it was going to be a week or more. Of course, since I have nothing but time, I volunteered.

See the garage in its former glory:


After 600 pounds of dirt gets scraped up and taken to the dump:


Next step: Build the "Building Frame"